Perfboard and stripboard layouts, done for you.

Describe the circuit or hand over your breadboard. Tinkered places every part, routes the wires, cuts the strips and shows you the order to solder it in.

Tinkered’s 3D studio simulating a desk weather station laid out on a perfboard: an Arduino Nano, a BME280 sensor and an OLED display soldered on the board, the firmware running and the display reading 25.0 °C, 50% RH and 1013 hPa, the parts library on the left and the serial monitor below.
Capabilities

Lay it out, run it, then solder it.

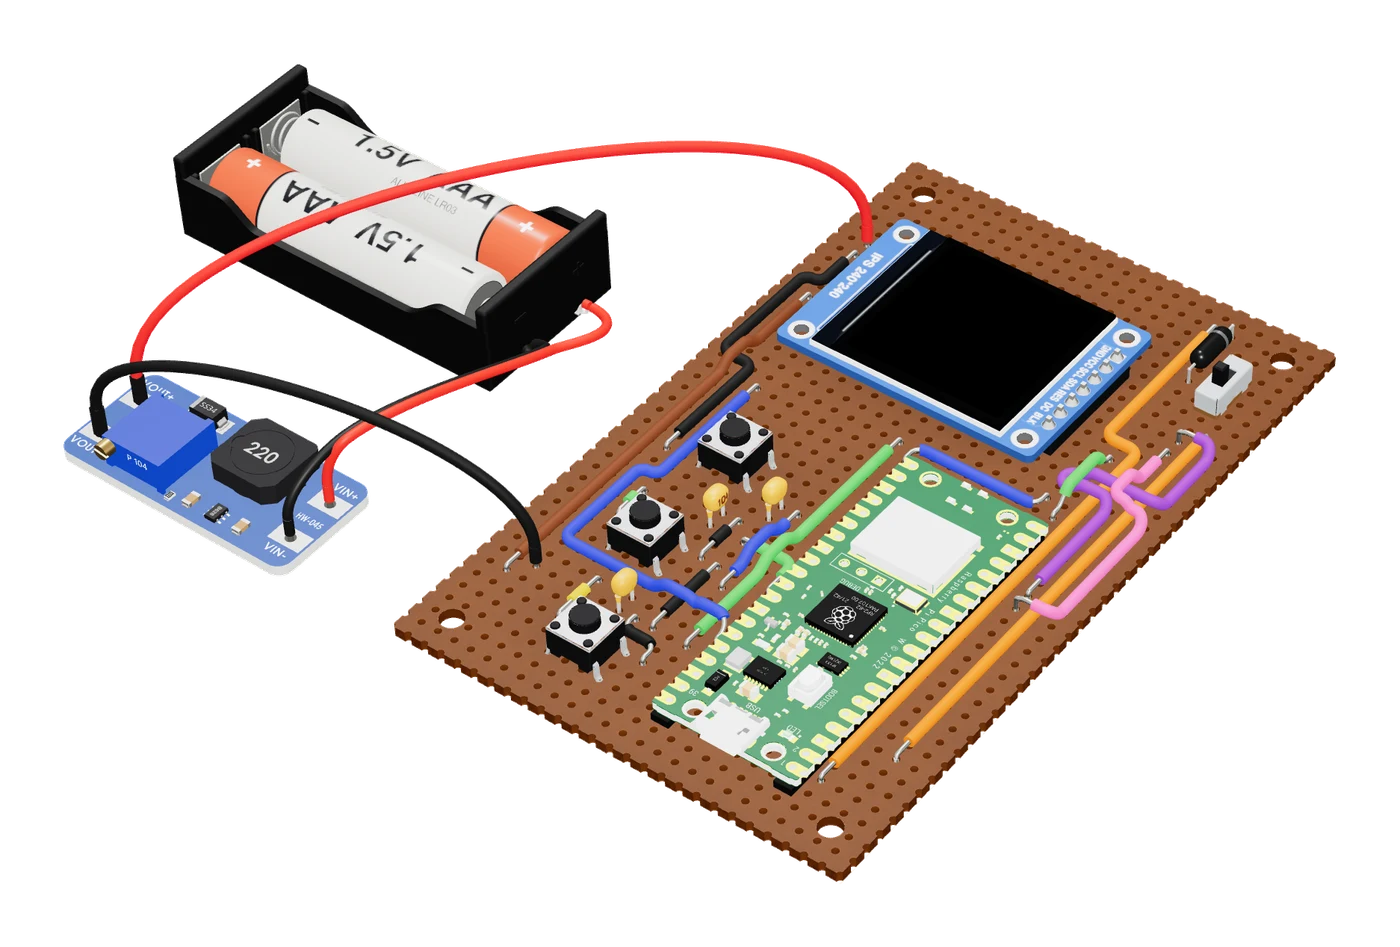
  1. A Raspberry Pi Pico W remote laid out by Tinkered on stripboard: a square display, three buttons, insulated wire links across the strips, and its battery pack and boost module beside it on leads.
    Lays out the boardEvery part placed and every wire planned, on perfboard or stripboard.
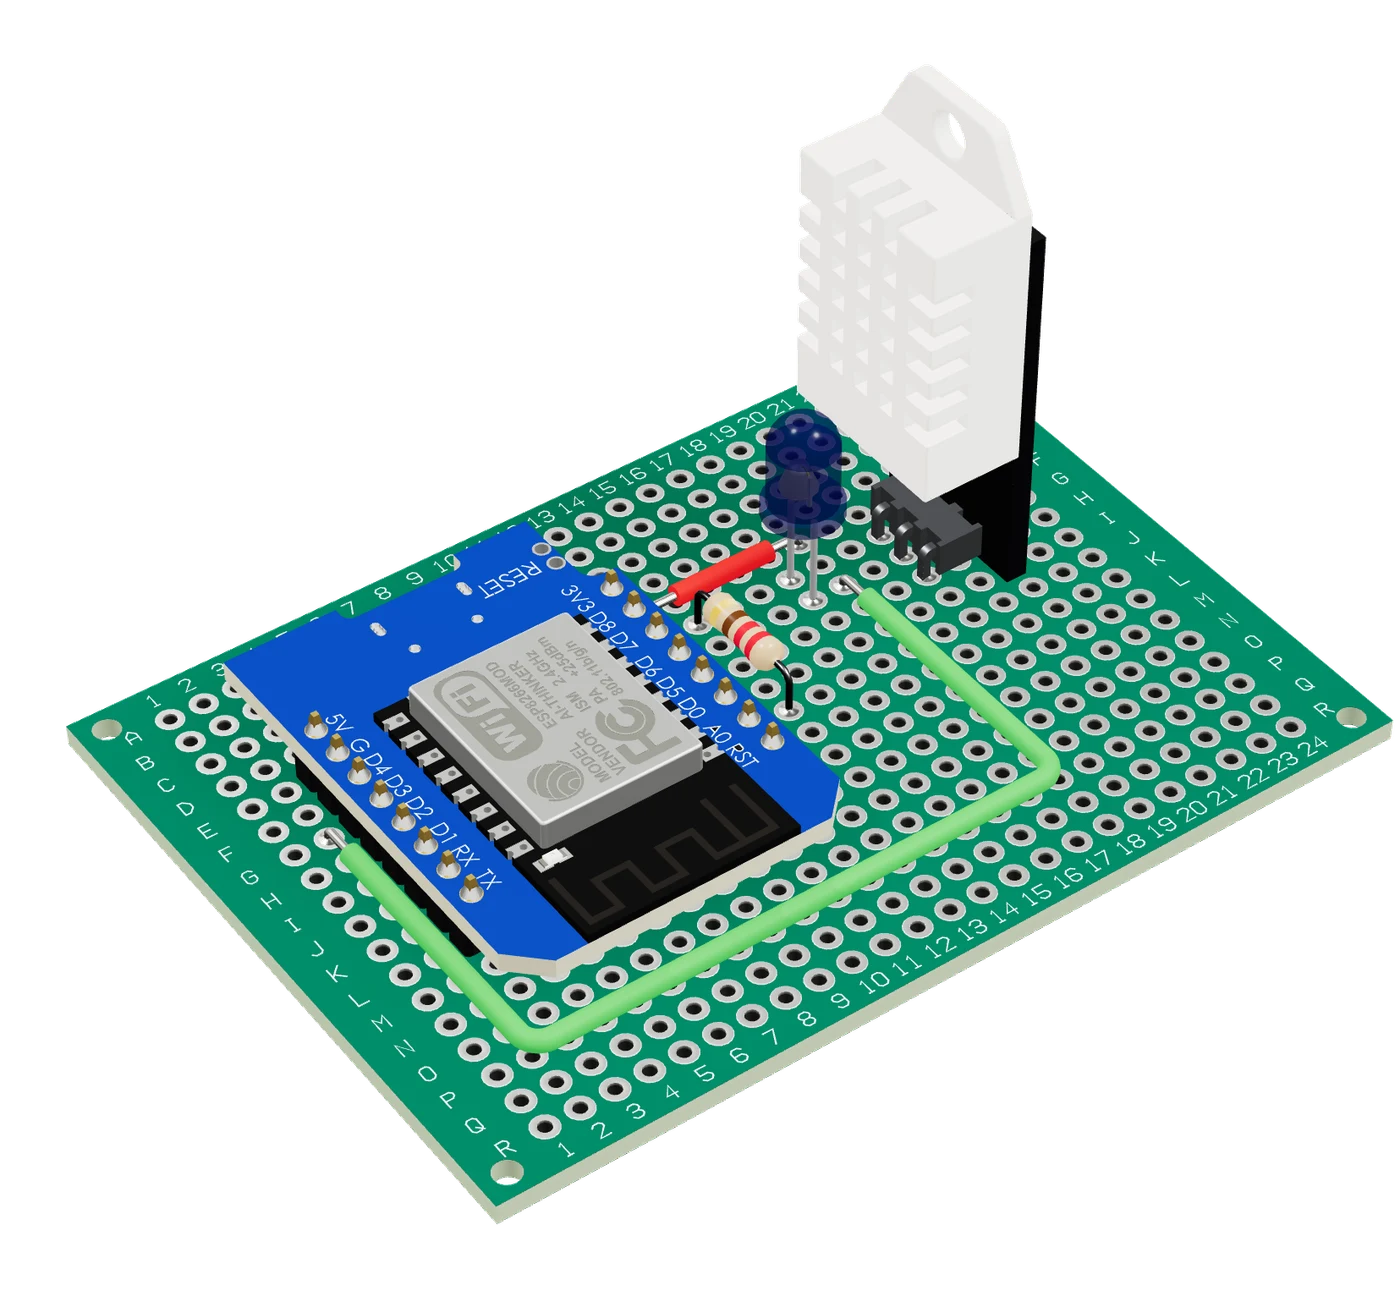
  2. A Wemos D1 mini thermometer laid out on a 5 x 7 cm perfboard: the D1 mini, a DHT22 sensor standing at the edge and a blue LED with its resistor.
    Places each partSensors at the edge, the display and buttons where you will use them.
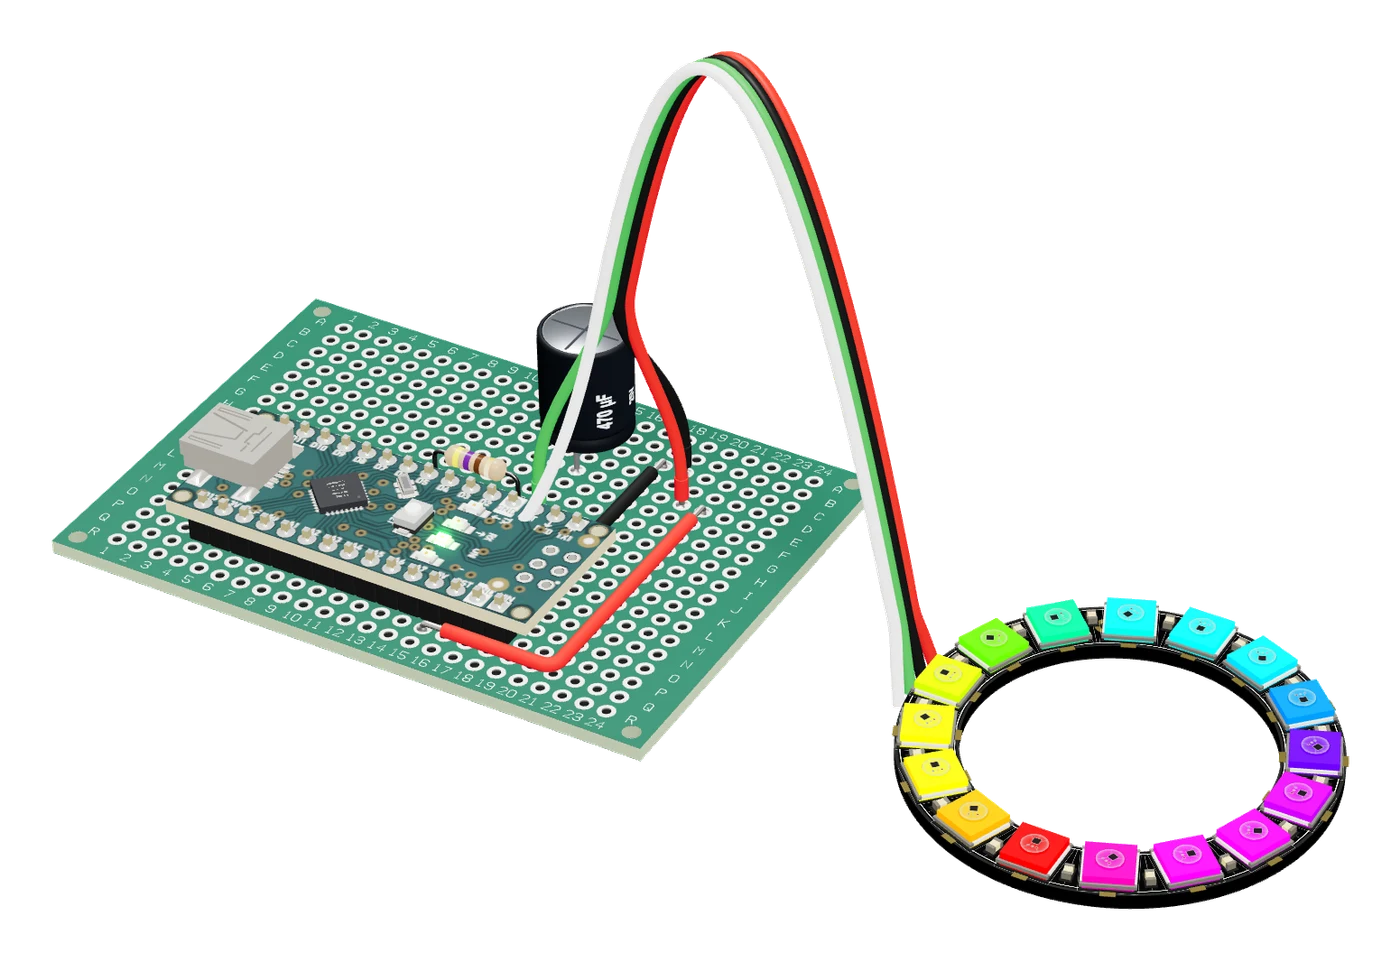
  3. An Arduino Nano on perfboard running in Tinkered’s simulator, its 16-pixel NeoPixel ring beside the board lit in a colour wheel.
    Runs before you solderYour code runs on the layout as it will be soldered.
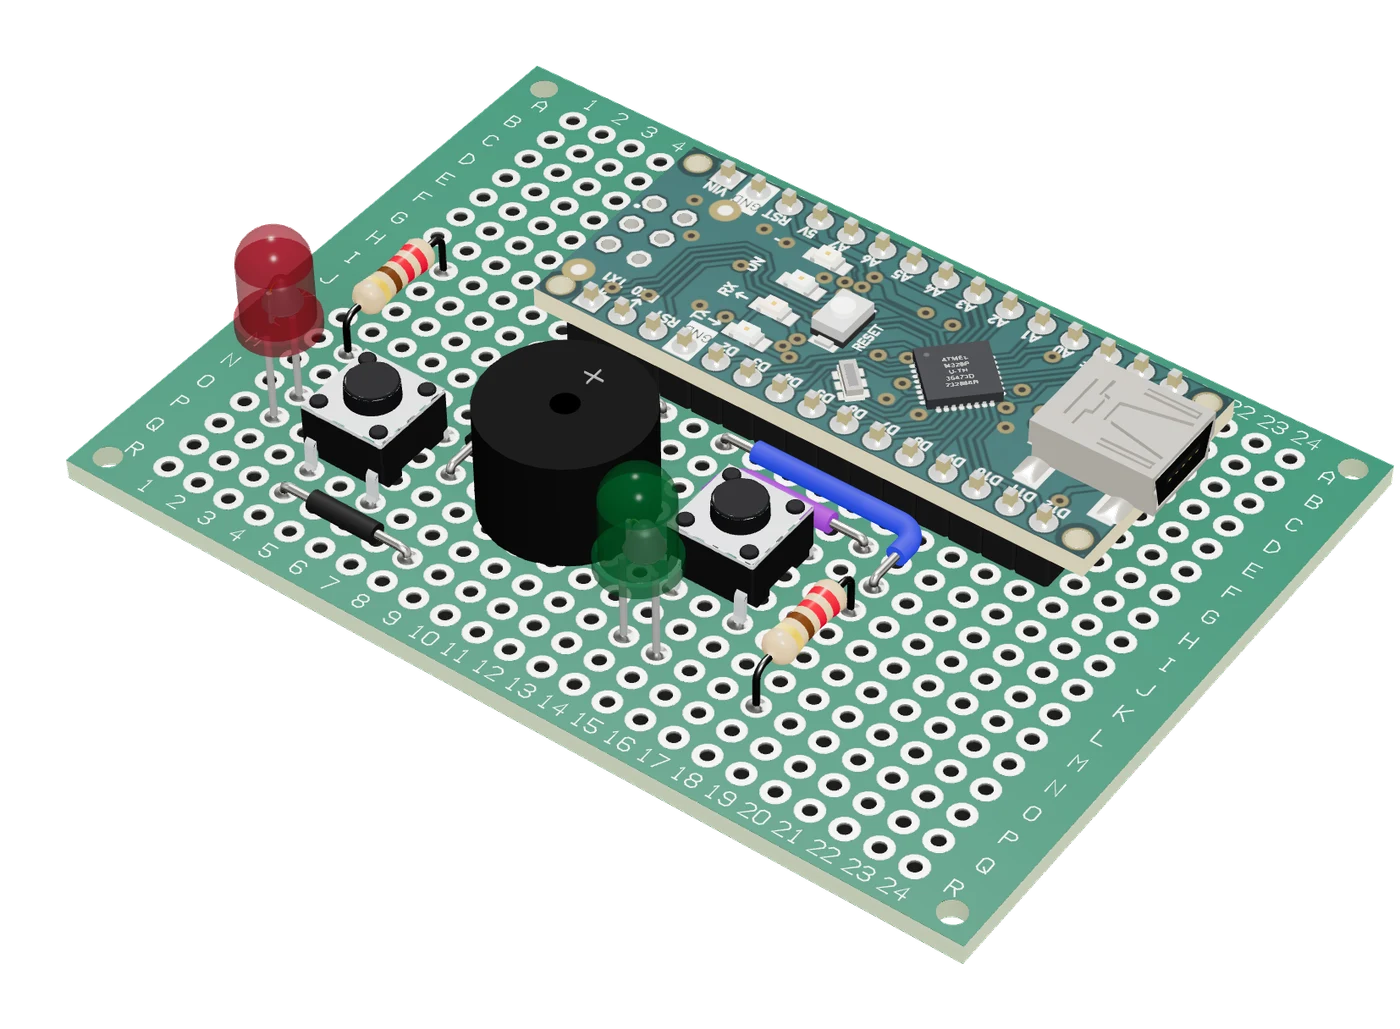
  4. A reaction game laid out on a 5 x 7 cm perfboard: an Arduino Nano, two LEDs with their resistors, two push buttons and a buzzer.
    Ready to solderA step-by-step guide and a list of everything to buy.
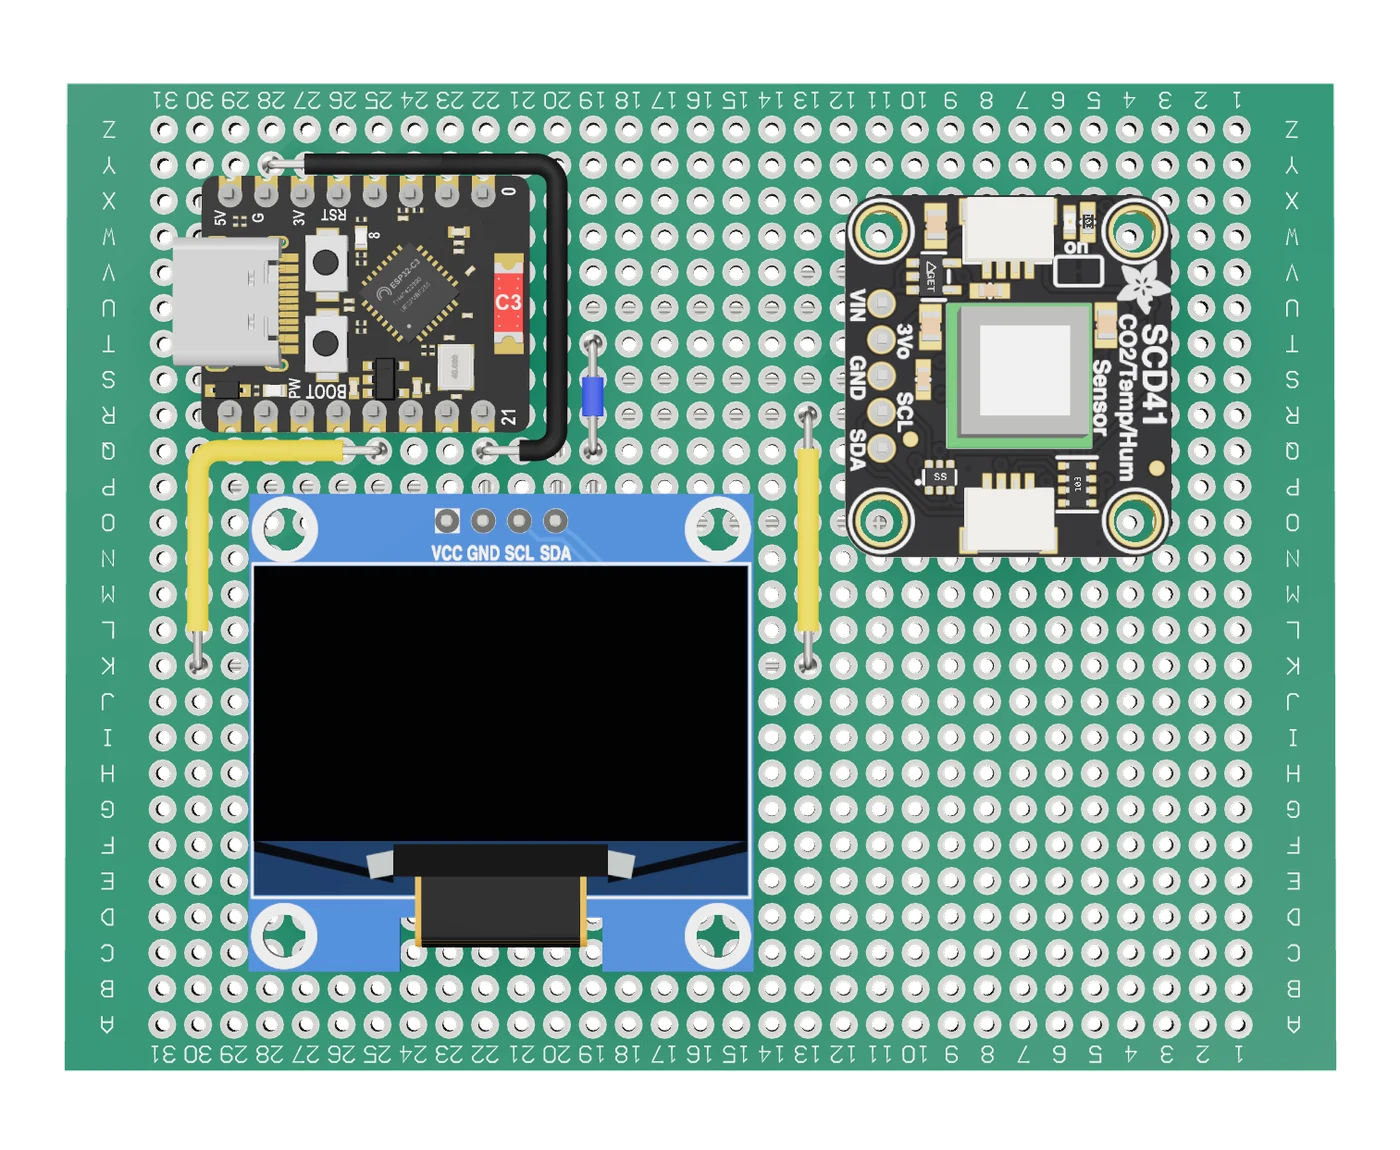
CO₂ monitorOn perfboard and stripboard (Veroboard)
  1. A CO₂ monitor laid out by Tinkered on a perfboard, seen from above: an ESP32-C3 SuperMini, an SCD41 CO₂ sensor and an OLED display in their holes, with a few insulated wires on top.
    Perfboard layout
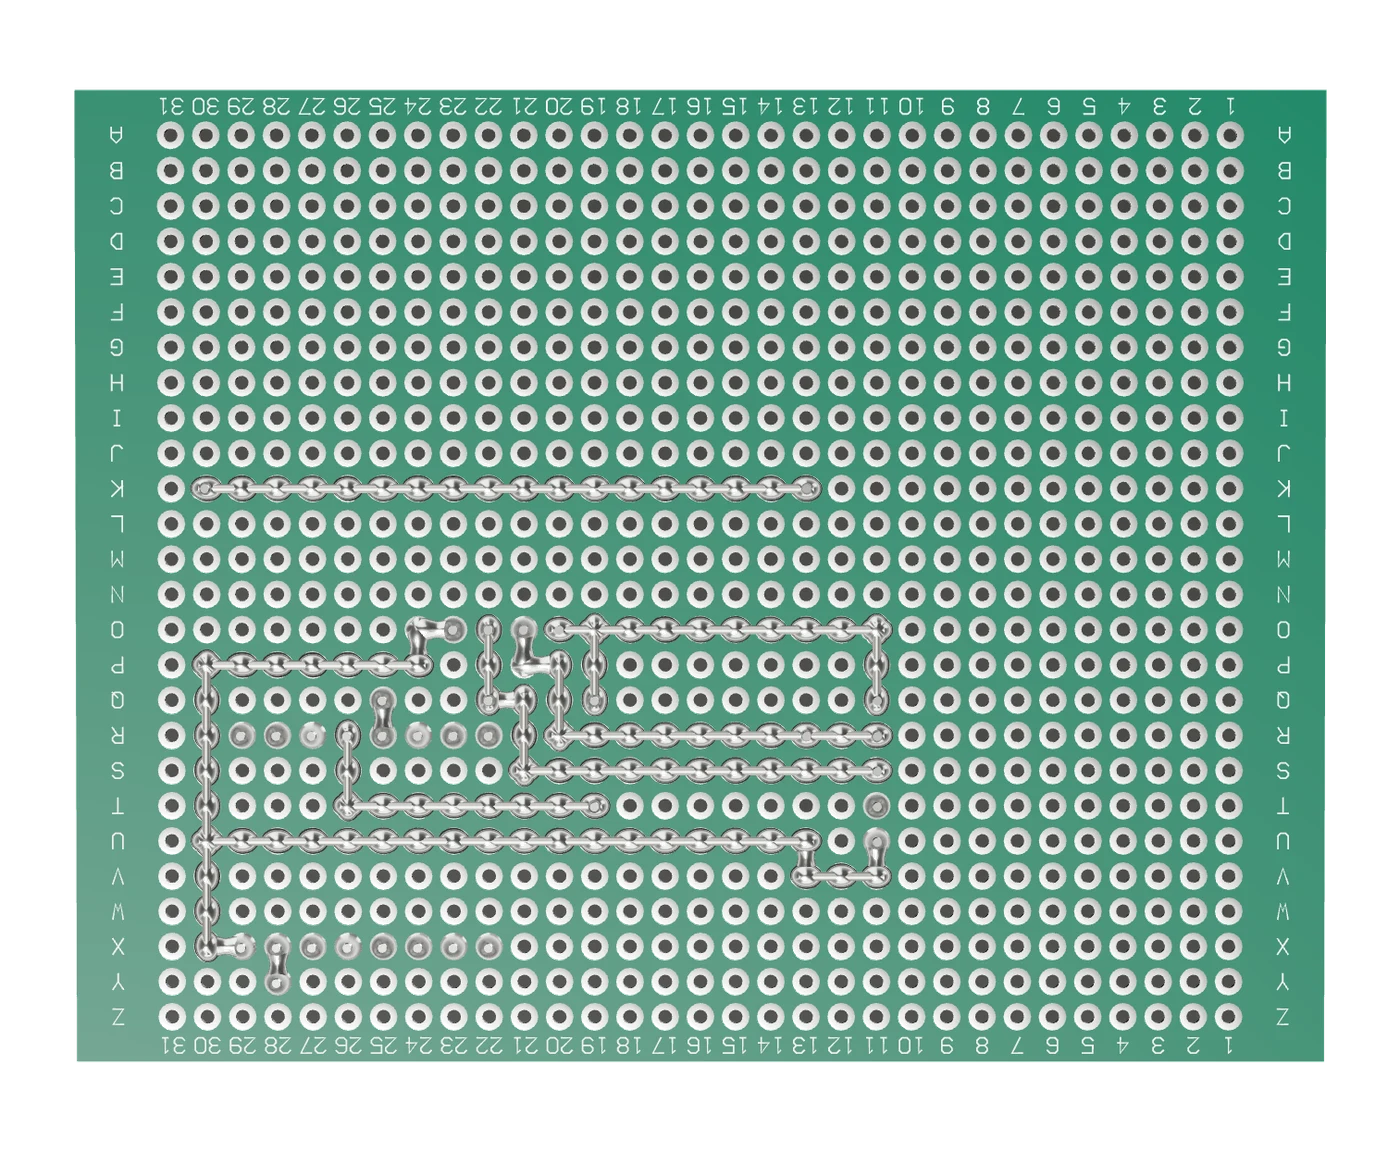
  2. The same perfboard layout from its solder side: solder bridges between neighbouring pads and bare tinned wire runs joining the parts.
    Solder side
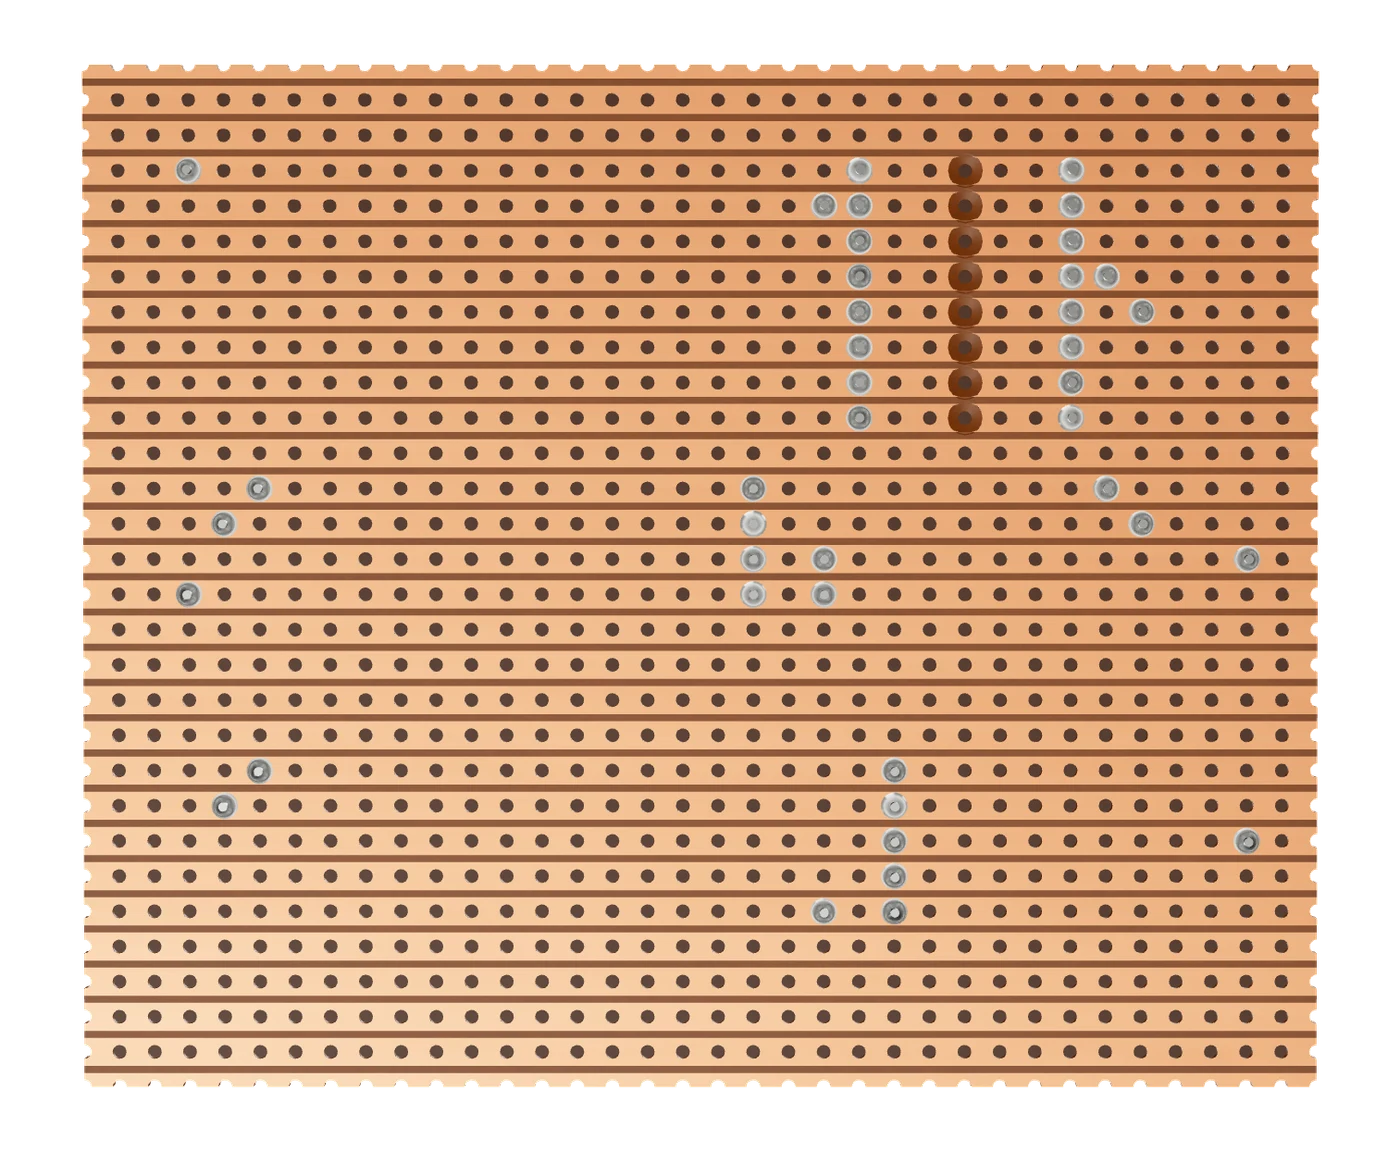
  3. The same circuit as a stripboard layout, from its copper side: the strips running across the board, a column of cuts breaking them where two connections must stay apart, and the soldered pins of each part.
    Stripboard, strips cut
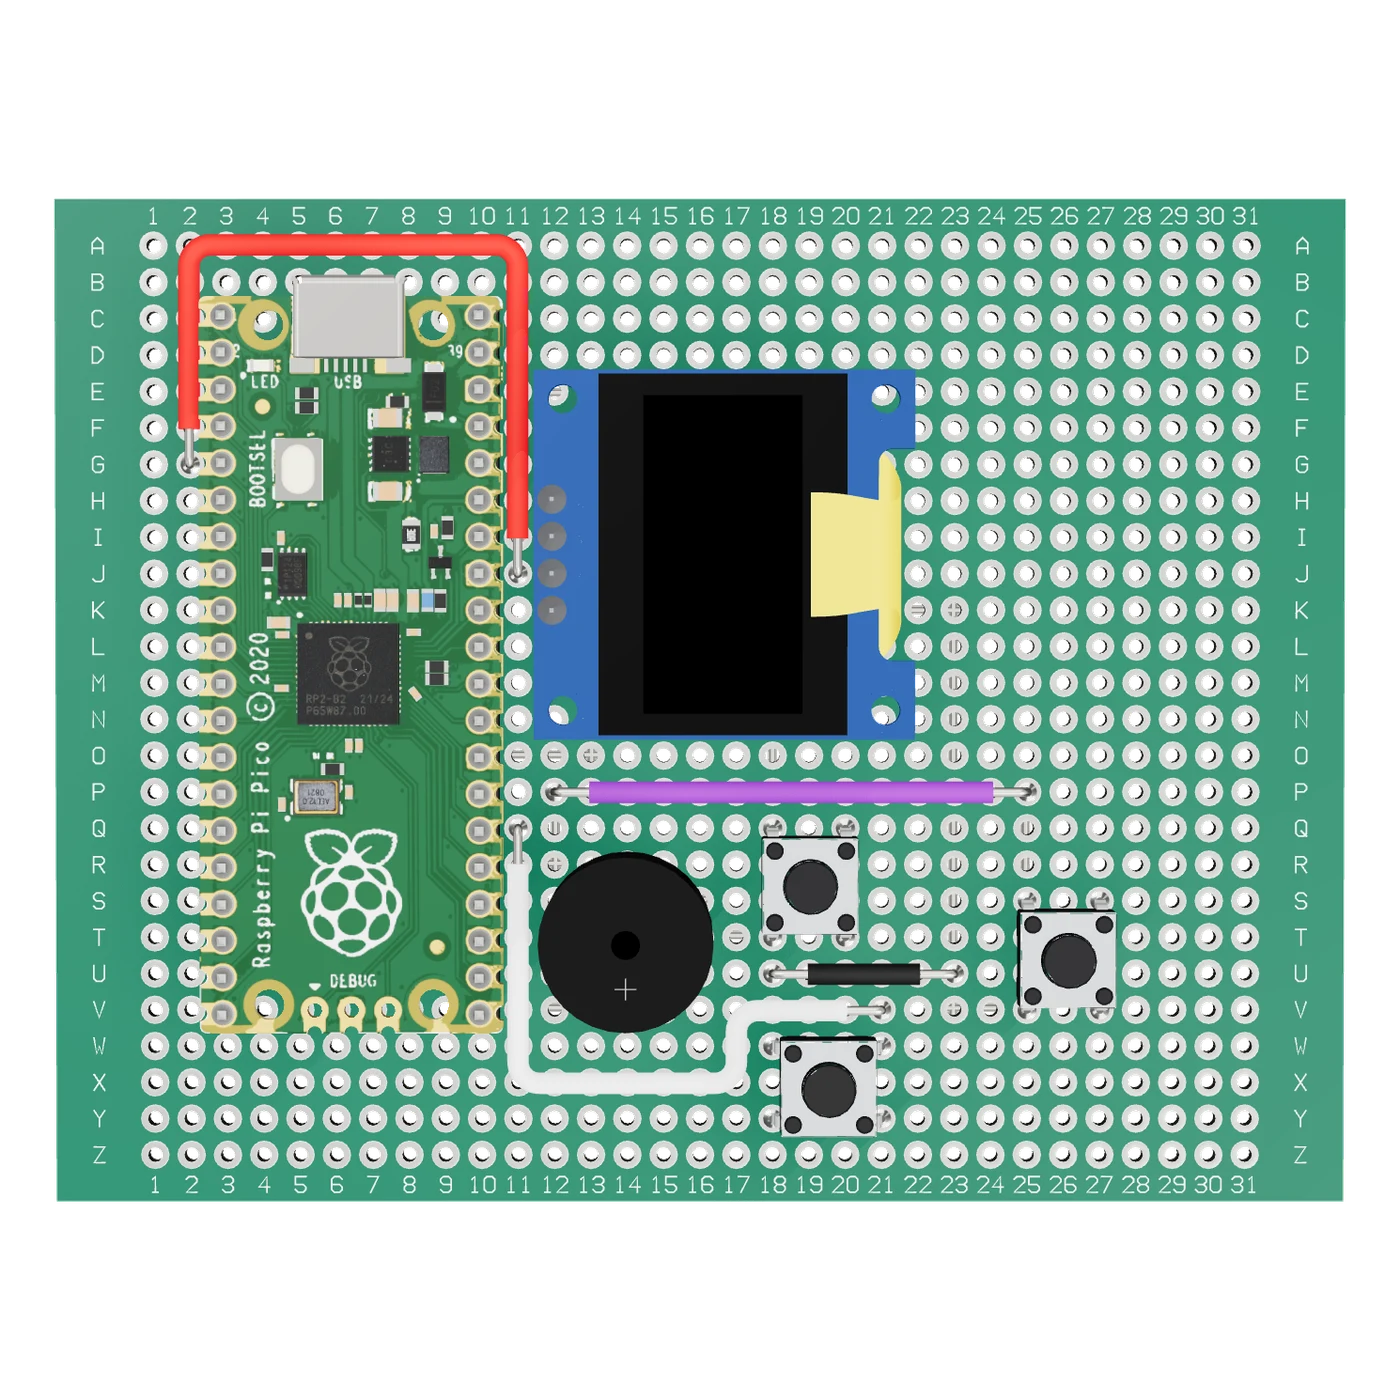
Pocket timerOne circuit, three layouts
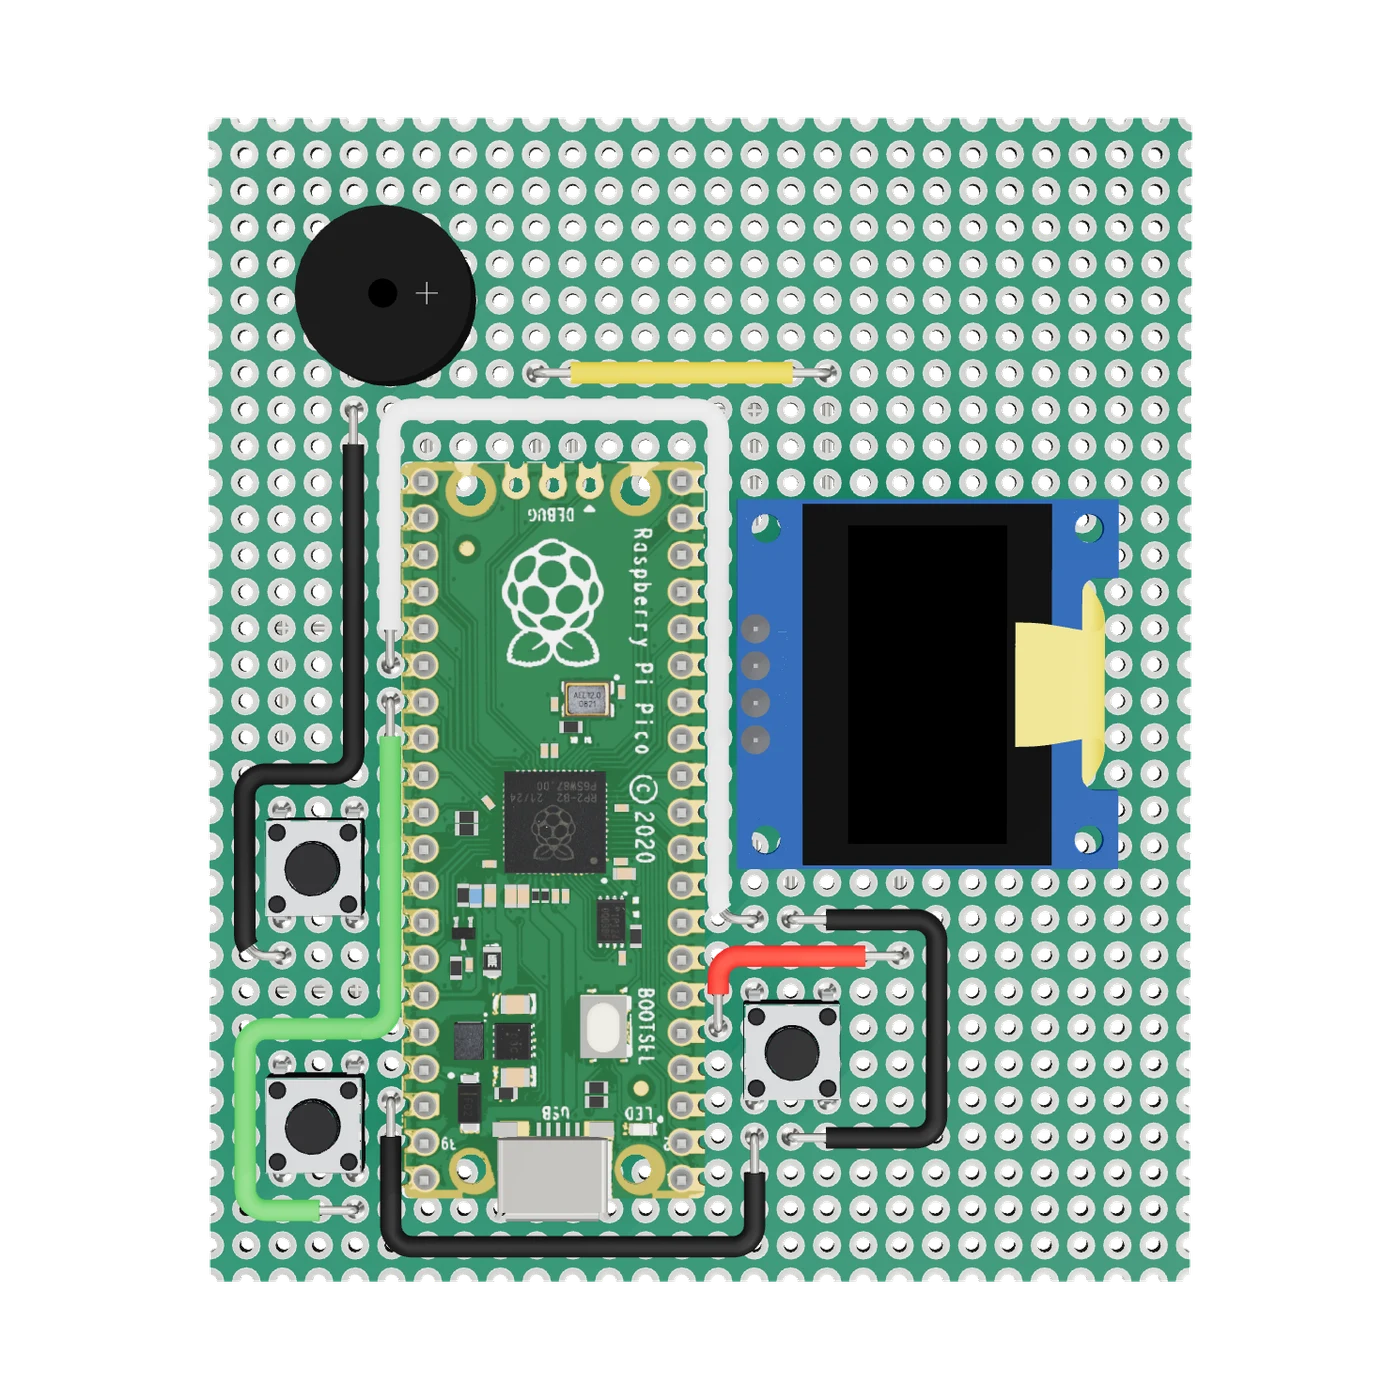
  1. A pocket timer laid out on perfboard for a desk: the display centred, the three buttons in the front half, nearest you, and the Raspberry Pi Pico’s USB connector facing the back.
    On a desk
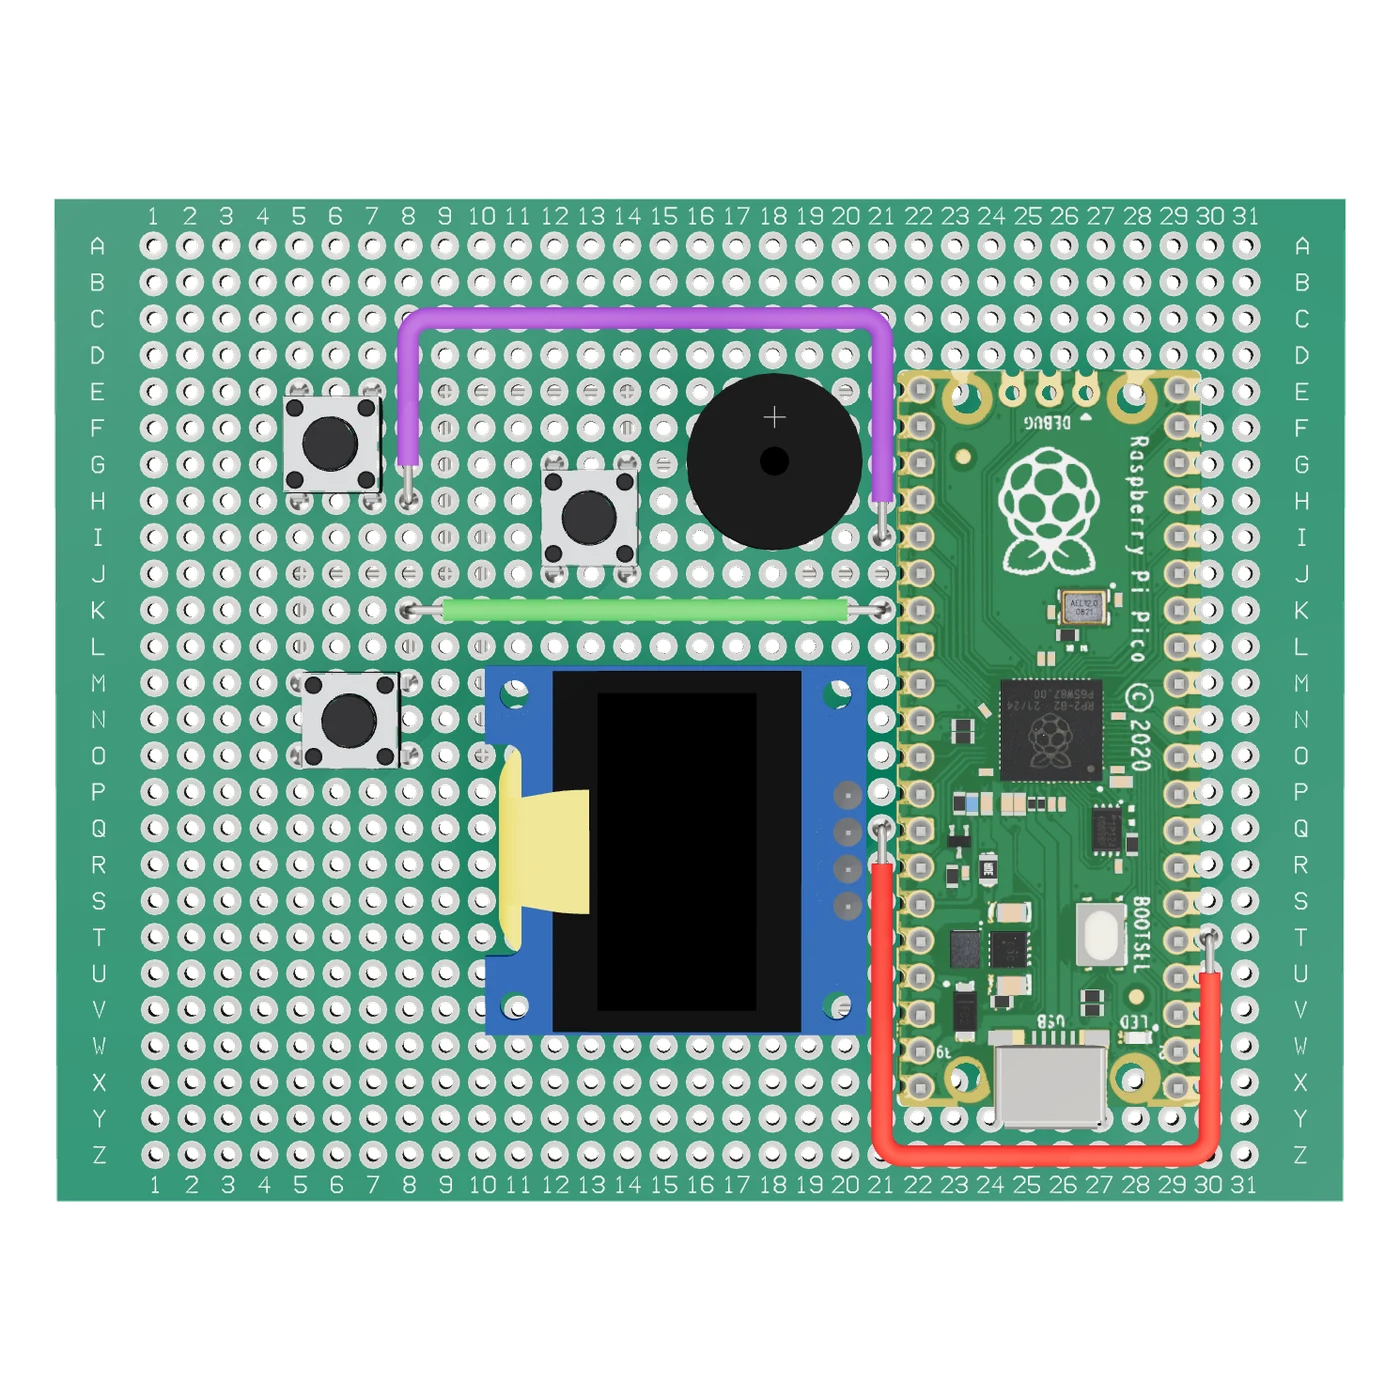
  2. The same pocket timer laid out on perfboard to hold in one hand: the buttons and the USB connector at the end you hold, the display in the far half.
    In the hand
  3. The same pocket timer laid out on perfboard to hang on a wall: the display centred and the USB connector facing down, toward the floor.
    On a wall
Status lightOne edit, caught
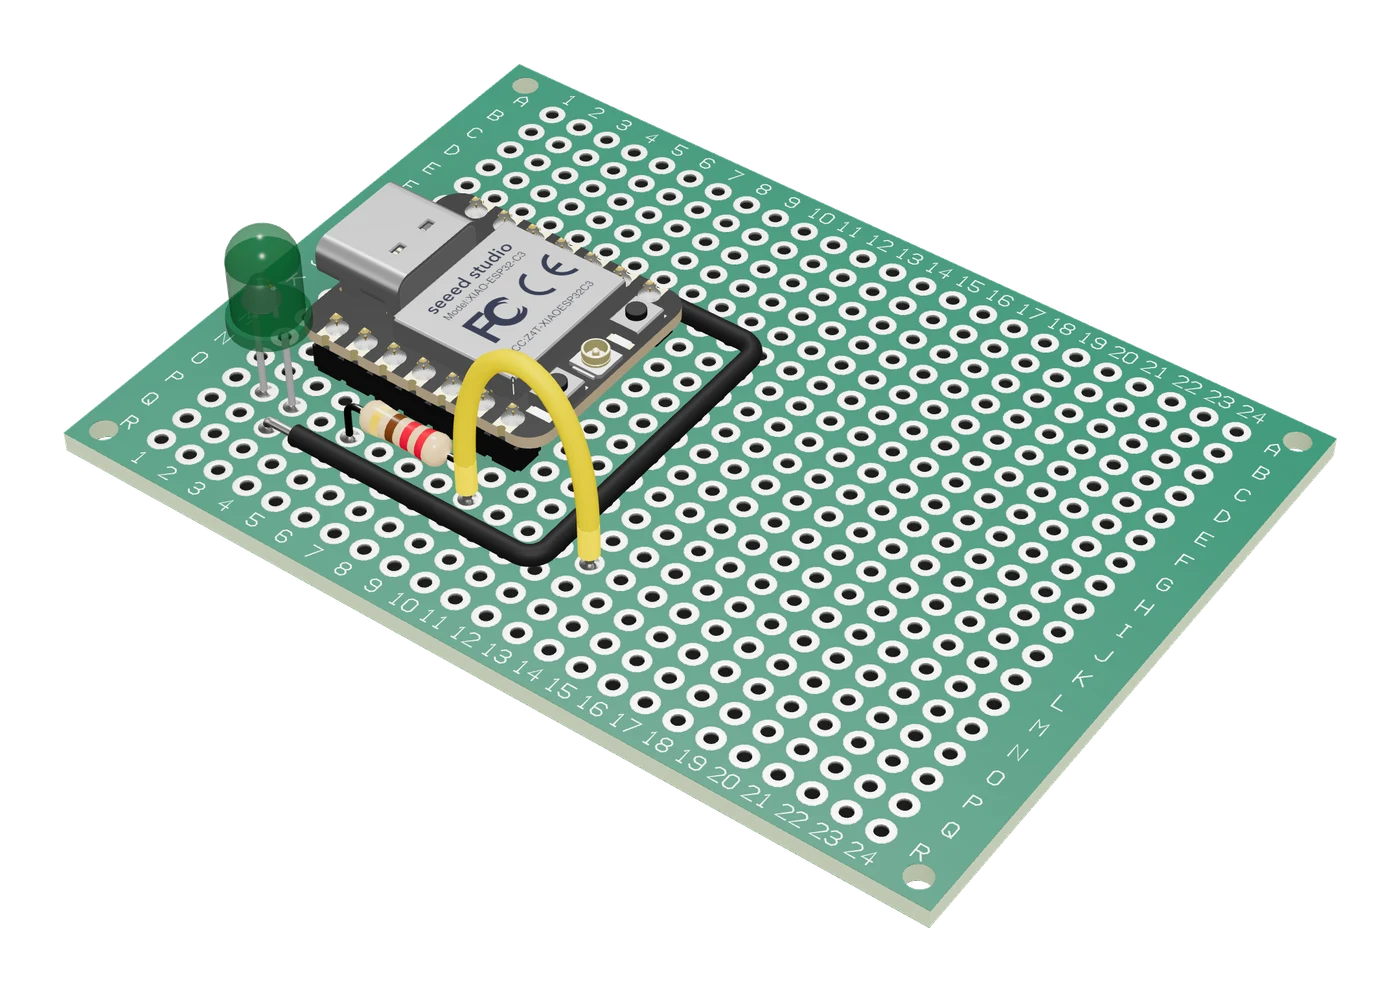
  1. A status light on perfboard in Tinkered’s 3D studio, a XIAO ESP32-C3, a resistor and a green LED, with a yellow lead pushed into the hole the resistor already uses.
    The board
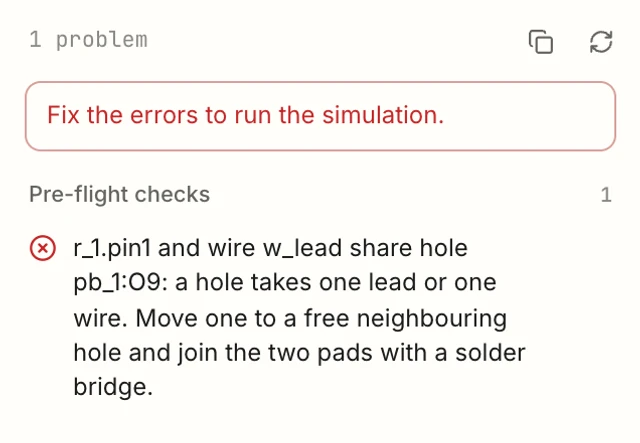
  2. The studio’s Checks panel: one problem, the resistor’s lead and the yellow wire sharing hole pb_1:O9, and how to fix it with a solder bridge.
    Checks
555 LED flasherIts guide and parts list
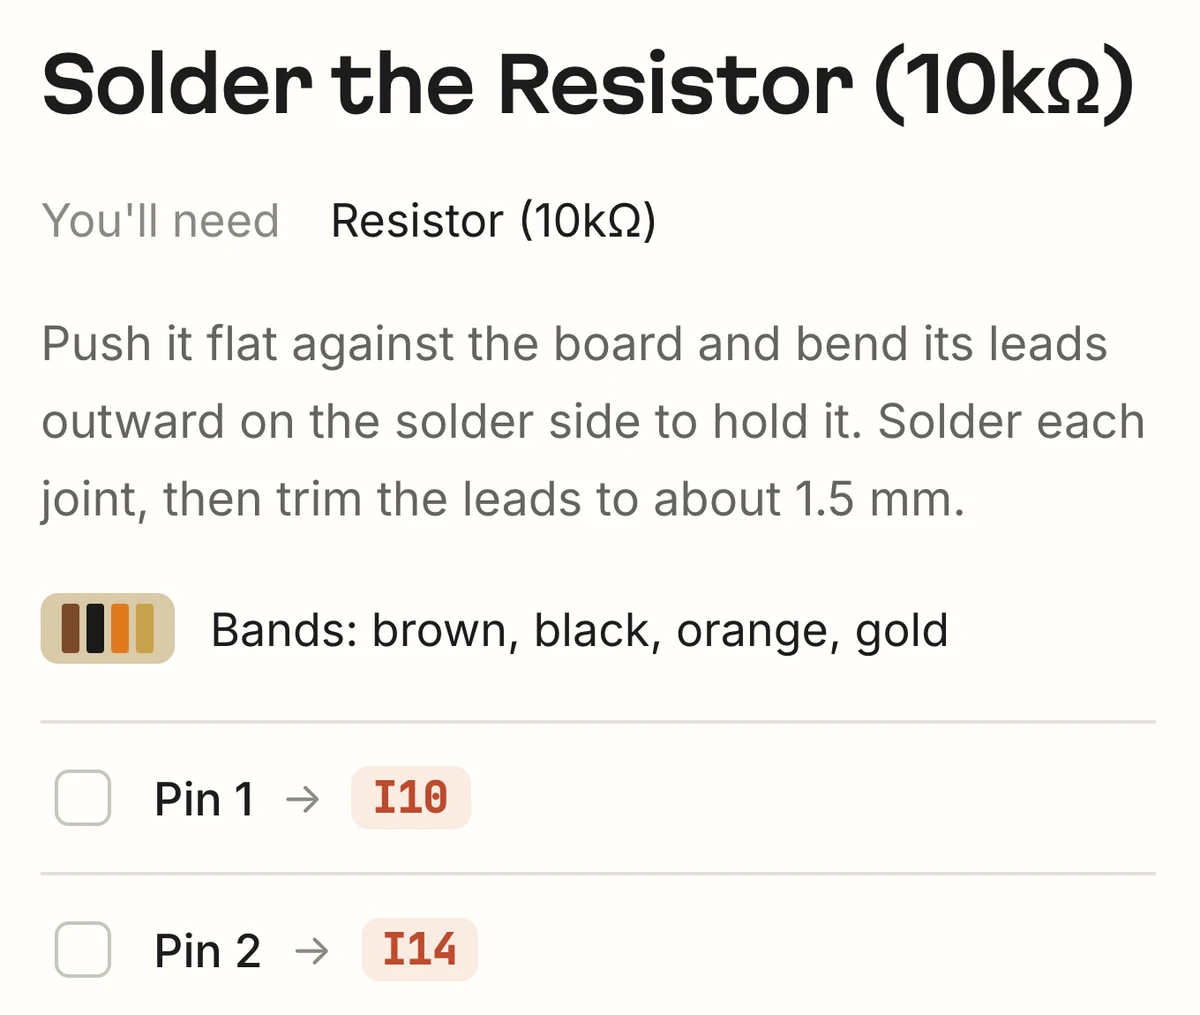
  1. The assembly guide’s step “Solder the Resistor (10kΩ)”: push it flat, bend its leads on the solder side, its colour bands brown, black, orange, gold, and its two pins with the holes they go in, I10 and I14.
    Each step
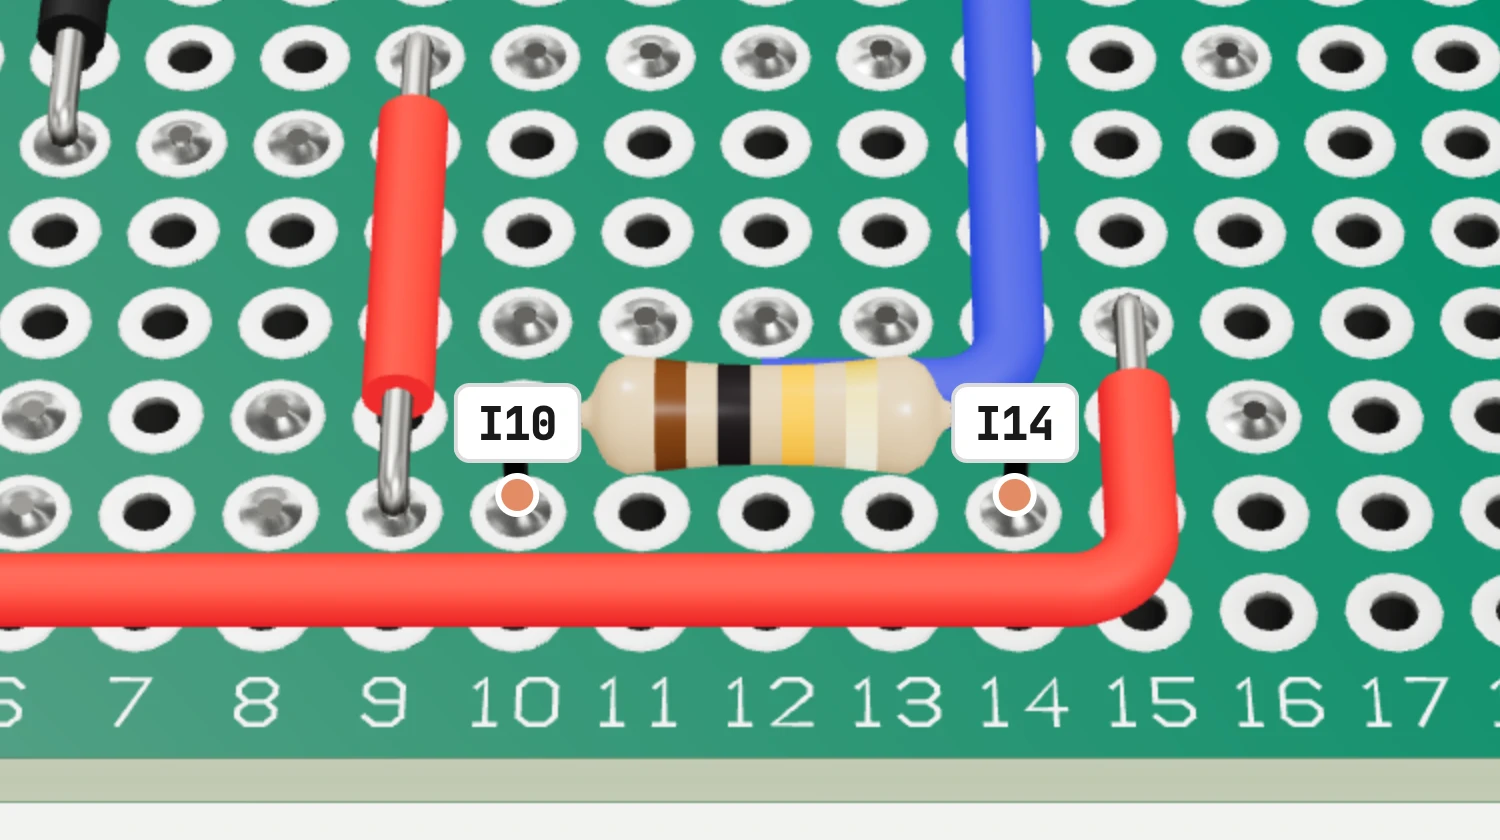
  2. The perfboard as the guide draws it for that step: the 10k resistor in place, its holes labelled I10 and I14, with the wires around it.
    On your board
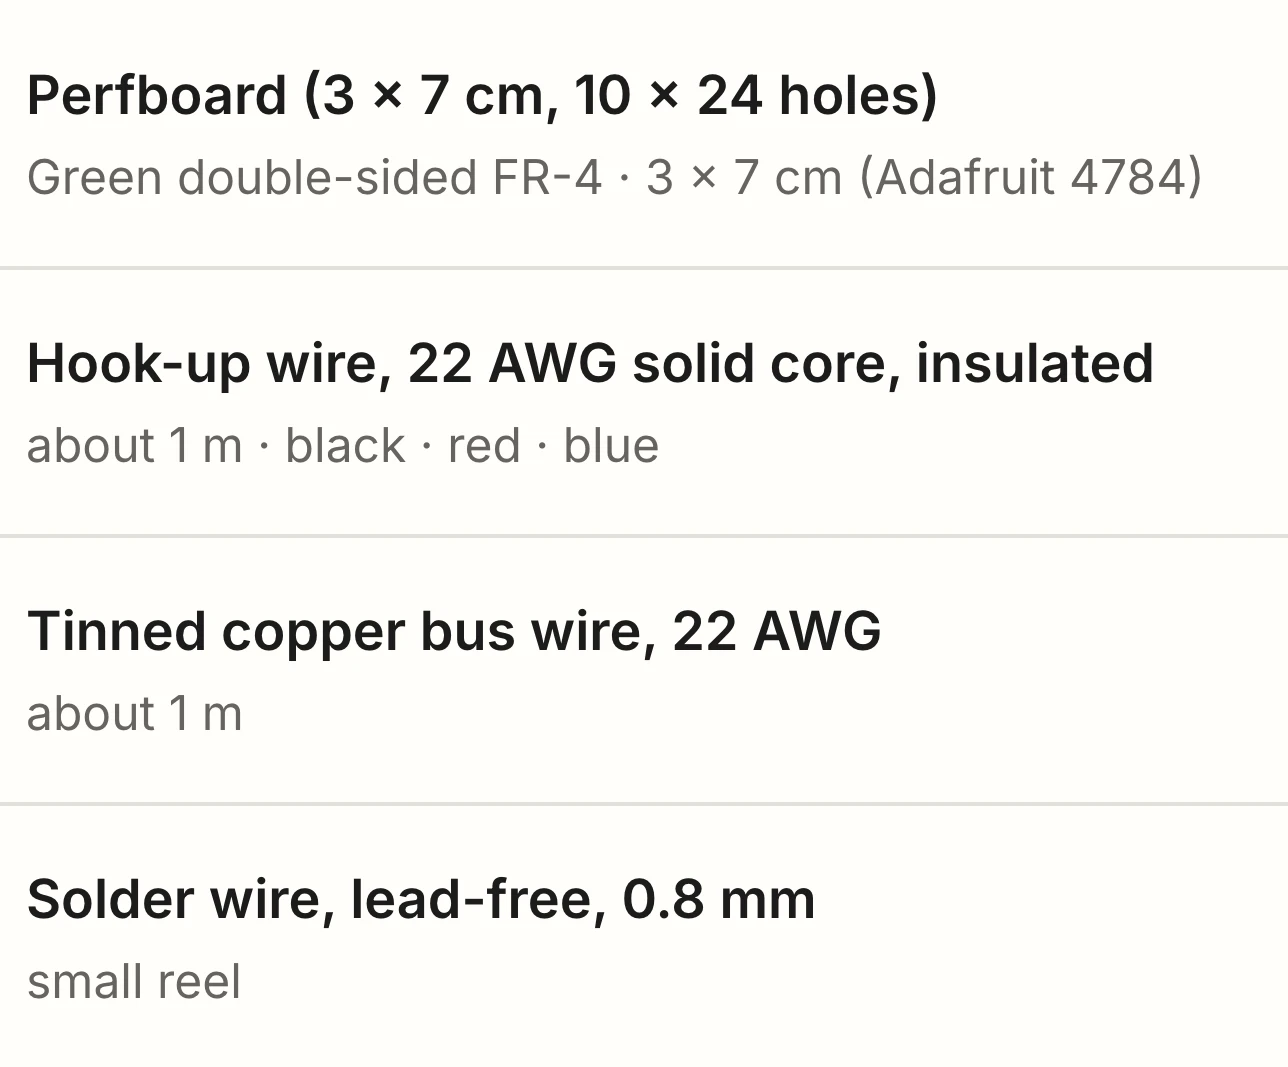
  3. The parts list’s build supplies: a 3 x 7 cm perfboard of 10 x 24 holes, 22 AWG hook-up wire, tinned copper bus wire and lead-free solder.
    What to buy

Questions, answered.

What is perfboard layout software?

It plans where each part goes on a perfboard or stripboard and how every connection is made, so you can solder a permanent circuit without guessing. Tinkered does it for you.

Can it turn my circuit into a stripboard (Veroboard) layout?

Yes. It places each part across the copper strips, marks where to cut them and adds the wire links on top, and shows you both sides of the board before you solder.

Perfboard or stripboard: which should I use?

Perfboard gives every hole its own pad, so you make each connection with solder and wire. Stripboard joins rows of holes with copper strips, so much of the wiring is done and you cut the strips where they must stop. Tinkered lays out both.

Can I start from my breadboard?

Yes. Build or describe the circuit, then ask Tinkered to make it permanent and it lays the same circuit out on perfboard or stripboard.

Does it work with Arduino, ESP32 and Raspberry Pi Pico?

Yes. Boards such as the Arduino Nano, ESP32 and ESP8266 boards, the Raspberry Pi Pico and the Seeed XIAO solder onto the board with your sensors, displays and buttons. An Arduino Uno stays beside the board on leads.

Can I test it before I solder?

Yes. The layout runs in Tinkered’s 3D simulator exactly as it is wired, your code included, so you see it work before you pick up the iron.

Can I change the layout myself?

Yes. Drag parts, draw wires, turn the board over, cut strips and resize the board in the 3D studio. Every change is checked and each problem is named by its hole.

Which board sizes does it use?

The smallest shop board your circuit fits on, from a 2 x 8 cm perfboard to a 100 x 160 mm stripboard, all on the standard 2.54 mm pitch, or a board cut to fit with mounting holes for a case.

Is it free?

Yes, Tinkered is free to start. It runs in your browser, so there is nothing to install.

What will you solder next?