INA219 Current Sensor with an Arduino Uno
A high-side current, voltage and power monitor over I2C: up to 26 V and ±3.2 A on the common 0.1 Ω module.
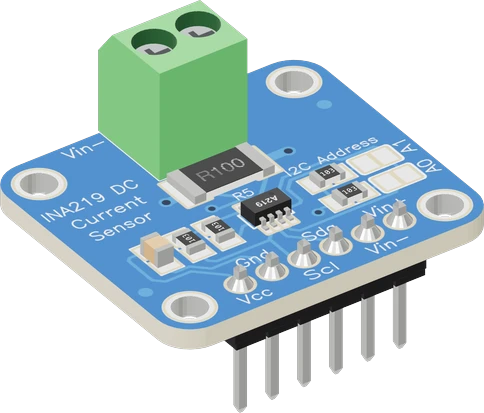
With VCC on the Arduino Uno's 5V the INA219 module's pull-ups hold SDA and SCL at 5 V, the Uno's own I2C level, on A4 and A5. In this wiring VIN+ is also on the Uno's 5V, so the module measures a load fed from the Uno itself, which sets how much current there is to measure.
Wiring the INA219 Current Sensor to the Arduino Uno
Pin by pin.
| INA219 Current Sensor | Arduino Uno |
|---|---|
| VCC | 5V |
| GND | GND |
| SDA | SDA |
| SCL | SCL |
| VIN_P | 5V |
What to know on the Arduino Uno
- The chip runs from 3 V to 5.5 V and its module pulls the bus up to VCC, so the Uno's 5V is the right supply: no level shifting on A4 and A5.TI INA219 datasheet SBOS448G, p. 6
- A load powered through the Uno's 5V from USB is limited by the Uno's 500 mA USB polyfuse, well under the module's ±3.2 A range. For such loads setCalibration_16V_400mA() (commented in the sketch) gives finer current steps than begin()'s 32 V / 2 A setting.Arduino UNO R3 documentation, USB overcurrent protection; Adafruit INA219 breakout guide
- The bus voltage is read against the module's GND, which is the Uno's GND. To measure a separate supply (a 12 V battery, up to 26 V), move VIN+ to that supply's + and join its - to the Uno's GND.TI INA219 datasheet SBOS448G, pp. 1, 5
- A 12-bit conversion takes 532 µs, so even the Uno's default 100 kHz I2C keeps up with readings every few milliseconds.TI INA219 datasheet SBOS448G, p. 5
INA219 Current Sensor code for the Arduino Uno
Compiled for arduino:avr:uno on 2026-10-30.
// INA219 Current Sensor on Arduino Uno: wiring and a free simulation at https://www.tinkered.ai/components/ina219-current-sensor/arduino-uno
#include <Arduino.h>
#include <Wire.h>
#include <Adafruit_INA219.h>

Adafruit_INA219 ina219;   // 0x40: the module's A0/A1 jumpers open

void setup() {
  Serial.begin(115200);
  if (!ina219.begin()) {
    Serial.println("INA219 not found: check VCC, SDA/SCL and its address jumpers");
    while (true) delay(10);
  }
  // begin() calibrates for 32 V / 2 A (0.1 mA steps); for loads under 400 mA:
  // ina219.setCalibration_16V_400mA();
}

void loop() {
  float shuntMv = ina219.getShuntVoltage_mV();
  float busV = ina219.getBusVoltage_V();     // VIN- against GND: the load's voltage
  float currentMa = ina219.getCurrent_mA();
  float powerMw = ina219.getPower_mW();
  float supplyV = busV + shuntMv / 1000.0;   // VIN+: the supply's voltage

  Serial.print("Load: ");
  Serial.print(busV, 3);
  Serial.print(" V  Supply: ");
  Serial.print(supplyV, 3);
  Serial.print(" V  Current: ");
  Serial.print(currentMa, 1);
  Serial.print(" mA  Power: ");
  Serial.print(powerMw, 0);
  Serial.println(" mW");
  delay(500);
}
INA219 Current Sensor on the Arduino Uno: questions
Can the INA219 measure the current my Arduino Uno project draws from 5V?
Yes, as wired here: VIN+ on the Uno's 5V, VIN- to the load's +. Over USB the Uno's polyfuse limits the total to 500 mA, so use the 16 V / 400 mA calibration for finer resolution.
Can I measure a 12 V supply with an INA219 on an Arduino Uno?
Yes. Keep the module's VCC on the Uno's 5V, put VIN+ on the 12 V supply's + and VIN- to the load, and join the supply's - to the Uno's GND. The bus input takes up to 26 V (TI datasheet, p. 1).
Which Uno pins does the INA219 use?
SDA on A4 and SCL on A5; the address is 0x40 with the A0 and A1 jumpers open (TI datasheet, p. 14).
Keep going
This guide as plain Markdown. /components/ina219-current-sensor/arduino-uno.md